


Sterling work

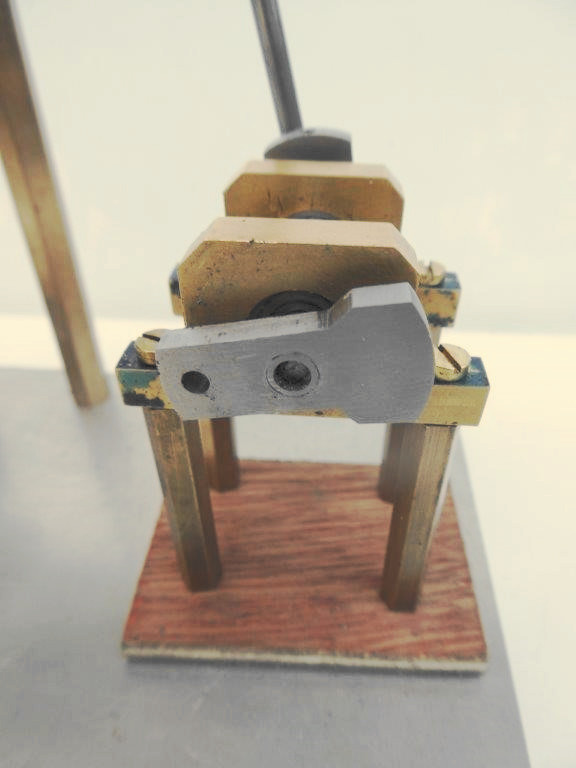
Various pieces placed roughly for the photo, and held together mainly by gravity.
The beams are nearly finished. They still need some final shaping and polishing. The columns to support them are done, but not yet fixed in place, as is rather obvious from the way the nearer one is leaning.
The linkage from the aluminium cylinder is complete. I will need to make a number of special small bolts for all the joints.
The crankshaft, crankwebs, and bearings temporarily mounted on a piece of plywood to keep it all together before I commit myself to making permanent holes in the base plate. All the parts still need some finishing.
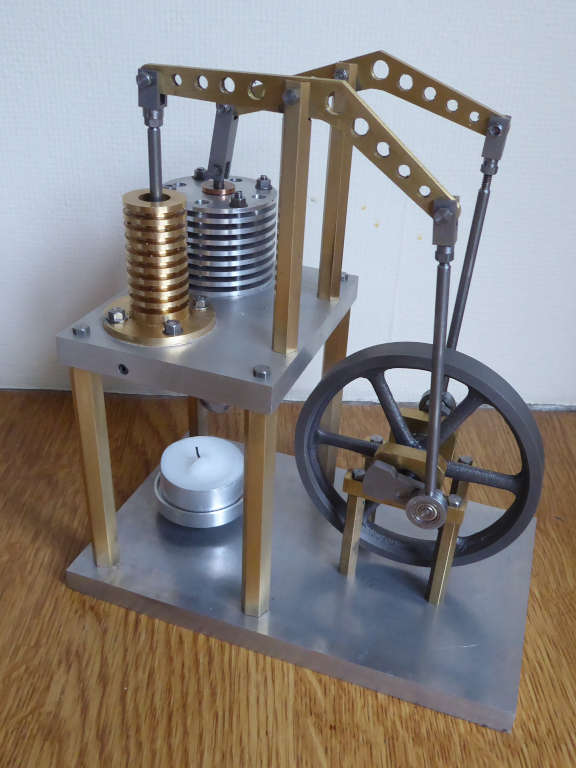
The aluminium cylinder is now drilled and bolted into place on its platform. Below it, this picture shows the conical flame shield, the glass cylinder and the glass displacer which moves inside it.

Cutting those two glass pieces to exact length wasted more time than almost anything else. There are several suggested techniques in Youtube videos, but most of them either left a jagged edge, or didn't work at all. The most successful method turned out to be spinning the tube in the lathe chuck and cutting it with a triangular diamond file.
The final instalment.
With just the second cylinder and the flywheel to make, the end was in sight. Making the brass cylinder was quite straightforward, but I was a bit nervous about the piston. The designer says "If one closes off the cylinder with the thumb, the piston must keep hanging in the cylinder. When the the thumb is withdrawn the piston must immediately fall down by its own weight..” So there was a fair bit of trial-and-error.
The two cylinders are connected via a hole in the upper platform, drilled from the outside and then blanked off with a grub screw - visible just below the brass cylinder in the following pic. It required a special extra long 3.5mm drill which I'm unlikely to ever use again, so if you need one, you know who to ask.
Machining the flywheel was easier than expected, and turned out well. With all the parts made, it was time to assemble it and check for leaks using the bicycle pump and bowl of water technique. No bubbles appeared, but while drying things off, I broke the glass cylinder. Well, at least I'm getting quite good at cutting new ones now.
With everything in place, I lit the tea light, and held my breath. Almost immediately it showed willing and after about a minute was running merrily.
There's a short video of it on Youtube here.
There are still a few cosmetic improvements to make, but it's basically finished, and it's been the ideal lockdown project – big enough to be satisfying, but small enough to finish.
Thank you Covid-19.
Author: Richard Bunce